Workflow dialogs
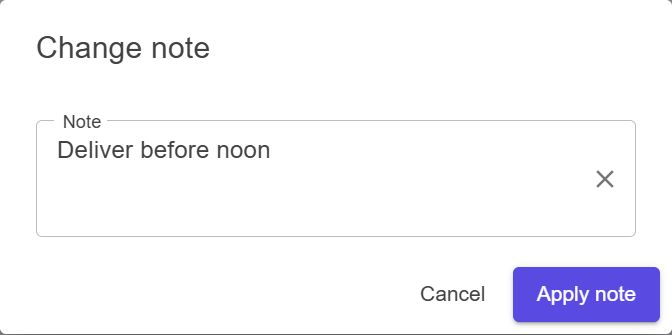
Use a workflow dialog to edit an Order's note before saving it. Apply note saves the change. Cancel leaves the Order unchanged.
Define the dialog
Create a virtual entity for the dialog. Its properties are not stored in the database.
Implement IWorkflowDialogConfirmable to add Confirm and Cancel buttons.
Declare Confirm with the label Apply note:
using System.ComponentModel.DataAnnotations;
using Benevia.Core.Workflows;

[Display(Name = "Change note")]
[Virtual]
[ApiEntity]
public partial class NoteDialog : IWorkflowDialogConfirmable
{
    [VirtualReferenceProperty("Order")]
    public partial DocsOrder Order { get; set; }

    [Virtual]
    [Property<DataTypes.MultilineText>("Note")]
    public partial string Note { get; set; }

    [Method("Apply note", MethodType.Modify)]
    public partial void Confirm();
}
Add the opening method to DocsOrder:
[Method("Change note", MethodType.Read)]
public partial NoteDialog ChangeNote();
Open and confirm it
In the Order's [RegisterLogic] method, create the dialog with args.Context.
Copy the current note into it:
order.Method(o => o.ChangeNote).Do((o, args) => new NoteDialog(args.Context)
{
    Order = o,
    Note = o.Note
});
Put confirmation logic in a separate Logic class:
[Logic]
public class NoteDialogBL(NoteDialog.Logic dialog)
{
    [RegisterLogic]
    public void Confirm() => dialog.Method(d => d.Confirm)
        .Do(d => d.Order.Note = d.Note)
        .OnSuccess("Note updated.");
}
ChangeNote opens the dialog without changing the Order.
Confirm copies the new note to the Order. Core then saves the workflow.
Cancel discards the edit. Retry save retries a failed save without running Confirm again.
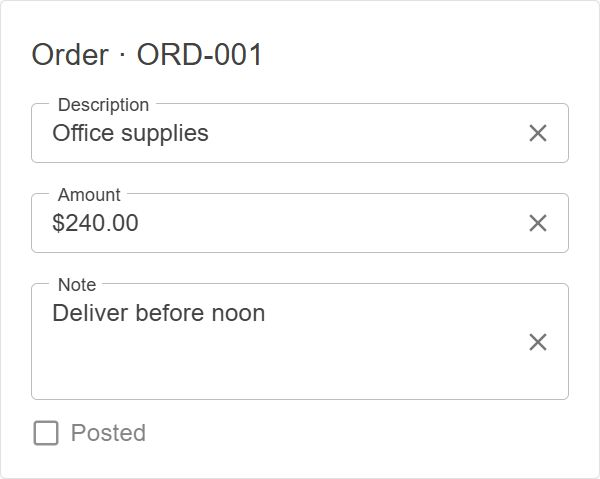
After Apply note: the Order shows the saved note.
Register the form
Choose the visible fields with a client graph:
using Benevia.Core.Client.GraphDefinitions.Builders;
using Benevia.Core.Client.Workflows;

public class NoteGraph : IWorkflowDialogGraph
{
    public GraphBuilder Build() => new GraphBuilder("NoteDialog")
        .Property("Note");
}
Register it during client startup with using Benevia.Core.Blazor.Workflows;:
builder.Services.AddWorkflowDialogs<NoteGraph>();
Then place the button inside the Order's DataGraph:
<MethodButton Method="ChangeNote" />
A SplitButton that uses graph methods can also open the dialog.
See the complete Order example for a working page.
Form and lifecycle reference
- Use
IWorkflowDialogalone for a dialog with a Close button. - The graph chooses the form's fields, references, and groups. Use
.DataPath(...)to load data without showing an editor. - Without a graph, Core shows the fields and references it supports. Permissions still apply.
- Save a new Order before opening its dialog. The opening method must return the dialog without asking a question.
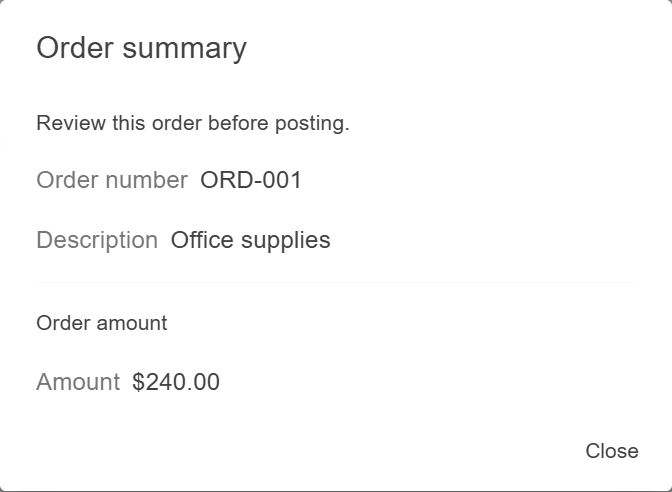
This custom Order summary form uses IWorkflowDialog. Core provides the Close button.
Reloading and custom forms
The dialog width ranges from 400px to Medium.
After closing, Core reloads the parent dataset if it has no pending edits.
If the parent has edits or shares an existing workflow, Core keeps its data.
OnInvoked receives the opening method's response after the dialog closes.
To replace only the form, register a Razor component alongside the graph:
builder.Services.AddWorkflowDialogs<NoteGraph, NoteForm>();
Use Core editors in NoteForm, such as <PropertyComponent Path="Note" />.
The component uses the same graph. Core still provides the dialog, buttons, and workflow.
Call WorkflowDialogs.OpenAsync(dataSet, method) to get the result and server responses.
Core shows messages after saving. Pass MethodMessageHandling.Manual to display them yourself.
Use custom handlers for methods with parameters.
Use OnClick to handle opening, saving, cancelling, and cleanup yourself.
See the automatic sample
and custom sample.